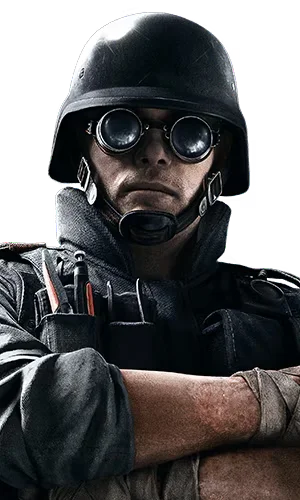
Thermite · Calypso Casino 2F
Cigar Room / Pool
Draft – not yet verified in-gamePlaying soloJust you and random teammates — a simple plan
Break open a strong wall so your team can get into the bomb room.
Your gadget: Exothermic Charge. Hard-breach charge that opens a large walk-through hole in a reinforced wall.
- Go this way: Main Stairs → 2F Main Lobby
- Go this way: Bridge → Credit
- Danger — an enemy often holds here: Minibar hold
- Break this strong wall: Pool wall — breach it from the Main Lobby
- Plant the defuser here: Pool, close to the Lobby wall
Red A/B circles are the two bomb spots. Numbers on the map match this list. Positions are drawn on Ubisoft's official blueprint and are approximate.
- Don’t use your gadget before a teammate destroys the enemy gadgets on the wall.
- Don’t stand right in front of the wall when it opens.
- Playing with strangers? Ping (mark) enemies and walls so your team knows.
Playing with a teamFull plan: every role, drones, breach, plant and what to do if it goes wrong
Open Pool from the 2F Main Lobby.
Team goal: Take the 2F Main Lobby and Credit, open the reinforced Pool wall and plant Pool with two angles covering it.
Hard breach (your main job)
Take the Main Lobby, wait for the wall to be cleared, then breach the Pool wall (orange line). Open Cigar from Kitchen only if you need it.
With Exothermic Charge: Stack on the marked hard-breach wall, wait for the anti-gadget player to call the wall clear, then place the charge on the centre of the wall. Stand off to the side while it burns — the hole becomes the team’s main entry.
Entry (if the team needs it)
Swing the breach with a trade partner; clear the Minibar side first.
With Exothermic Charge: Once the wall is down, you are often the closest player to site: clear the near corner of the hole with your team, not alone.
Spawn & approach
Ruins side (Main Door → Main Stairs) for the Lobby breach. Crane side for the Bridge. Pool side for the Tequila Door / terrace.
- Main Stairs up to the 2F Main Lobby — the main lane to the Pool wall.
- The Bridge (Crane side) into Credit, south of Pool.
- The Pool side terrace and Tequila Door for Kitchen; the roof and crane for rappel pressure.
Drone checklist
- Pool and Cigar anchors, and the opening between the two rooms.
- Minibar and Barista — defenders hold the Lobby from there.
- Smoking and Aqua, where a roamer waits for the Aqua Stairs push.
- Heaven, Rope and Coat for roamers who spawn-peek the Main Stairs.
Team map
- Move: Main Stairs → 2F Main Lobby
- Move: Bridge → Credit
- Enemy likely: Minibar hold
- Enemy likely: Cigar anchor
- Hard breach: Pool wall — breach it from the Main Lobby
- Move: Push through the breach into Pool
- Plant: Pool, close to the Lobby wall
- Hard breach: Cigar wall — second breach from Kitchen
- Move: Pool side terrace → Kitchen wall
- Drone: Drone Pool, Minibar and Cigar
- Soft breach: Kitchen outside wall (open from the terrace)
- Hold: 2F Main Lobby, watching the breach
- Hold: Credit, watching Stick
- Hold: Main Stairs (flank)
Red A/B circles are the two bomb spots. Numbers on the map match this list. Positions are drawn on Ubisoft's official blueprint and are approximate.
Team execute
- Come up the Main Stairs into the 2F Main Lobby. One player takes the Bridge into Credit, one takes the Pool side terrace to the Tequila Door.
- Drone Pool, Cigar, Minibar and Barista.
- The anti-gadget player clears the Pool wall from the Main Lobby, then the hard breacher opens it.
- Push Pool through the breach while the Credit player peeks Stick and the west player opens Kitchen.
- Plant Pool; open Cigar from Kitchen or Smoking only if you need it.
Plant
Plant Pool right after the Main Lobby wall opens, close to that wall, so the players in the 2F Main Lobby and Credit both cover it. Cigar is planted from Kitchen or Smoking once Pool is clear.
Post-plant positions
- 2F Main Lobby, looking through the breach
- Credit, watching Stick
- Kitchen / Tequila Door (west flank)
- Main Stairs (flank from 1F)
Pitfalls
- Placing the charge before Bandit/Kaid/Mute is cleared — it gets fried or jammed.
- Standing in front of the wall where defenders can shoot through the burning hole.
- Standing in the Lobby with Minibar or Heaven still alive behind you.
- Pushing Pool while Cigar can shoot you through the gap between the rooms.
- Rushing the Main Stairs into a spawn-peek from Coat or Heaven.
- Only playing the terrace — it is easy to deny from Kitchen.
- Planting Cigar while Pool is still held.
If defenders…
- If the Pool wall is denied, breach Cigar from Kitchen (terrace side) or Smoking instead.
- If defenders stack Pool, plant Cigar and play Kitchen and Smoking.
More & sources
Thermite on other Calypso Casino floors
Full team plan for this floor →
Defending instead? Cigar Room / Pool setups
Sources
- Ubisoft – Calypso Casino map page (official blueprints)
- stratbook.gg – Calypso Casino site overview
- Recon 6 – Calypso Casino guide (site summaries)
- R6 Prep – Calypso Casino defender site setups
- peekabooR6 – Calypso Casino spawn peeks
- siege.gg – Calypso Casino coming in Y11S2
Callouts from the community R6Calls project, aligned to Ubisoft's official blueprints.